How to Decontaminate Your Car’s Paint: A 3-Step Pro Guide
You wash your car every week, but somehow, it never feels truly, deeply clean. Even after scrubbing, the paint feels slightly rough to the touch. This is because a standard car wash only removes loose dirt and grime. It does nothing to address the stubborn, bonded contaminants that cling to your paint.
To achieve a truly pure surface—a requirement before any polishing or coating application—you need to perform a **full decontamination wash**. This multi-step process uses specialized chemicals and tools to strip away everything that shouldn’t be on your paint.
A decontamination wash is the foundation of all serious detailing. It’s the difference between a car that looks clean and a car that is clean on a microscopic level.
This guide will walk you through the three essential stages of a complete decontamination wash.
The 3 Stages of a Full Decontamination
These three stages are performed sequentially after a standard two-bucket wash to progressively remove deeper and more stubborn types of contamination.
-
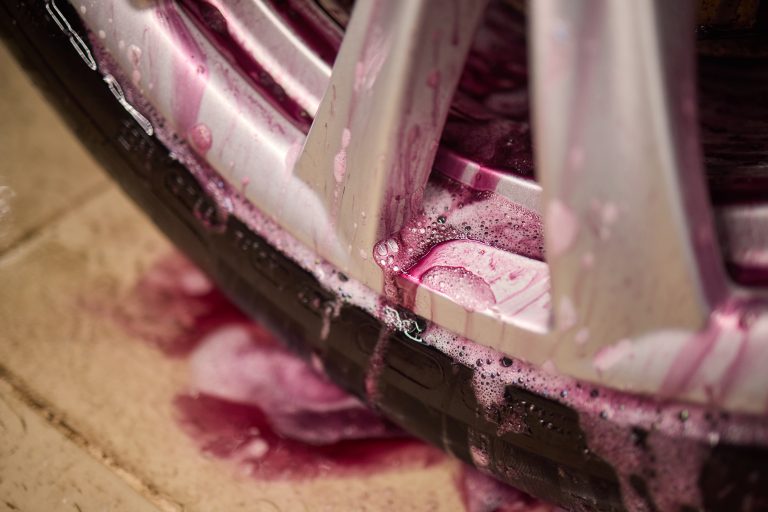
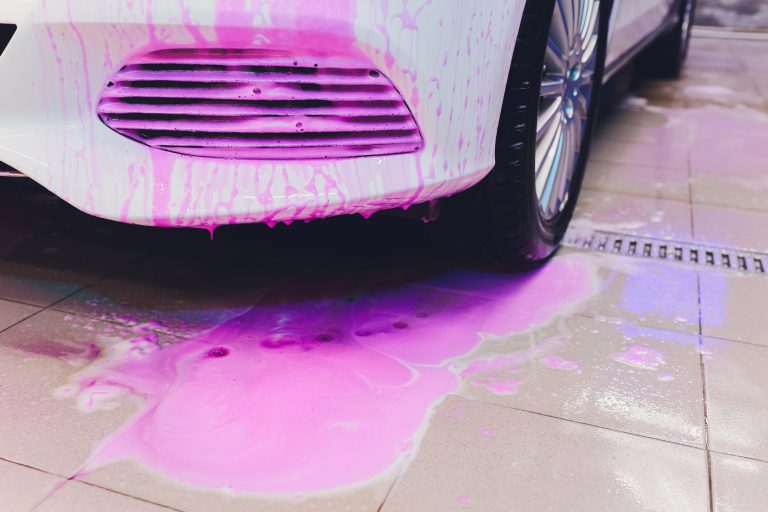
Stage 1: Chemical Decontamination (Iron & Tar)
This stage targets two common chemical contaminants that bond to your paint:
- Iron Particles: Tiny, sharp metal fragments from brake dust and industrial fallout that embed in your clear coat and cause rust spots.
- Tar & Adhesives: Sticky black specks of road tar and adhesive residue from road markings or old decals.
These are removed with dedicated chemical sprays. An iron remover will dissolve ferrous particles (famously turning purple as it works), and a tar remover will dissolve sticky residues, allowing them to be safely wiped away.
Recommended Iron Remover: Gyeon Q²M IronCheck PriceRecommended Tar Remover: CarPro TarXCheck Price -
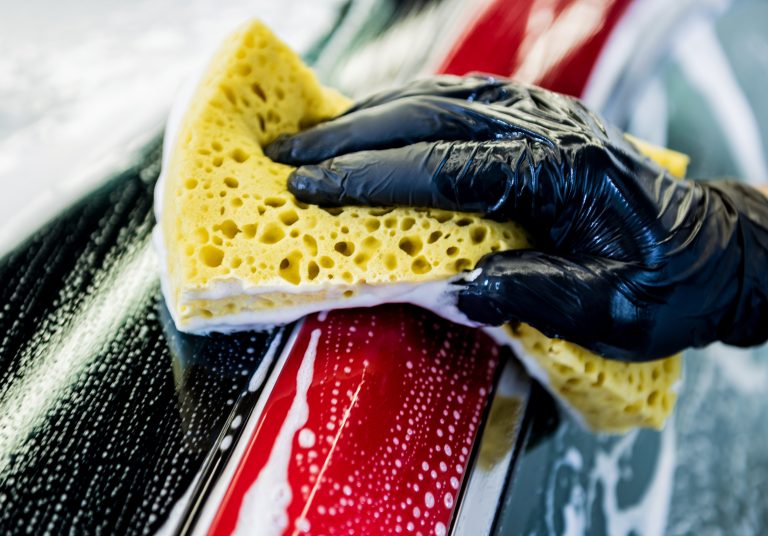
Stage 2: Physical Decontamination (Clay Bar / Mitt)
After the chemicals have done their work, there may still be embedded contaminants like tree sap, paint overspray, and mineral deposits. These must be removed physically. This is done using a detailing clay bar or a modern clay mitt/towel.
You spray a clay lubricant onto a small section of the paint and gently glide the clay across the surface. The clay is tacky and will shear off any contaminants that are protruding from the clear coat, leaving behind a surface that is as smooth as glass.
Recommended Clay Alternative: Griot’s Garage Fine Surface Prep MittCheck Price -
Stage 3: The “Strip Wash” (Removing Old Protection)
The final step is to remove any old waxes, sealants, or oils left on the surface from previous products or the clay lubricant. This ensures the surface is completely bare and sterile, ready for polishing or a new layer of protection.
This is achieved with a “strip wash,” which is a slightly more aggressive wash using a soap with strong cleaning capabilities but that is still safe for your paint. Many brands offer dedicated “strip wash” or “coating prep” shampoos for this exact purpose.
Recommended Strip Wash: Adam’s Polishes Strip WashCheck Price
The Verdict: A Non-Negotiable Step for Serious Results
Performing a full three-stage decontamination wash is a labor-intensive process, but it is absolutely essential before any paint correction or ceramic coating application. Skipping this step and simply washing the car is like painting a wall without cleaning or sanding it first—the final result will be subpar and short-lived.
By chemically and physically removing all bonded contaminants, you create the truly clean canvas required for polishing pads to work effectively and for ceramic coatings to form a strong, durable bond.
Ready for a Truly Perfect Finish?
A full decontamination is the foundation of a professional detailing service. It’s a step that no true pro would ever skip. They have the experience and professional-grade chemicals to ensure every last contaminant is safely removed before they even think about touching your paint with a polisher.
Find a Detailing ProfessionalSimilar Posts
How to Wash a Ceramic Coated Car: The Ultimate Guide (2025)
You’ve just made a significant investment in protecting your vehicle’s paint. A ceramic coating is on…
The 5 Essential Products for Your Ceramic Coating Maintenance Kit (2025)
You’ve made the smart decision to protect your vehicle with a ceramic coating. Now, how do…
The 3 Best Iron Removers for a Deep Decontamination (2025)
A standard car wash removes dirt, but it does nothing to address the invisible enemy bonded…
The Top-Rated Iron & Tar Removers for 2025
A standard car wash is only the beginning of a truly clean car. To prepare your…
Are Waterless Washes Safe for Ceramic Coatings? An Expert Analysis
The concept of a “waterless wash” is one of the most debated topics in detailing. It…
Can You Re-Apply a Ceramic Coating Over an Old One? (The Pro Guide)
Your ceramic coating has served you well for years. It’s protected your car from the elements…